A buddy of mine asked me to write a tool for one of our favorite video games. How could I say no?! Say hello to Color Picker 1.0.0 .
.
Table of Contents
- What Is the PSO2 Color Palette?
- Why Add the PSO2 Color Palette?
- How Does the PSO2 Color Palette Work?
- Other Changes?
- Plans for the Future?
What Is the PSO2 Color Palette?
If you’re familiar with Phantasy Star Online 2 (PSO2), then you’re probably familiar with the salon which allows you to modify the color of various aspects of your character. For example, there’s a color palette for your skin, your eyes, and some of your outfits.
Well, one of my friends, Robert, wanted to know how hard it would be to write a program that could look up the location of an RGB color in the palette. Naturally, I decided to do that and more !
!
Now, if you run the program, you’ll be greeted with a line requesting a file path:
Please provide file name (include .png):
Then, as soon as you provide one, you’ll be greeted with a request for an RGB value:
Please provide file name (include .png): the-renegade-coder-color-palette.png
Please enter a color as comma-separated RGB:
For the sake of argument, I’ve provided The Renegade Coder red:
Please provide file name (include .png): the-renegade-coder-color-palette.png
Please enter a color as comma-separated RGB: 201, 2, 41
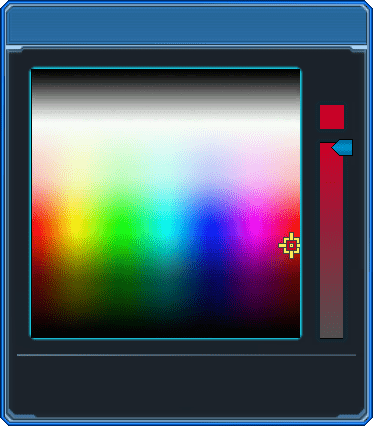
Once the color is entered, the color palette will be rendered and displayed. In addition, a copy of the palette will be saved. Check it out:

With this color palette, qw can now go into the game and try to replicate the color. In the next section, we’ll talk about how awesome this is.
Why Add the PSO2 Color Palette?
As someone who is slightly obsessed with the Phantasy Star franchise (see here and here), I’ve obviously been playing Phastasy Star Online 2 (PSO2). While the game is incredible, it still has quite a few kinks—which is to be expected of an 8-year-old port.
Of course, that hasn’t stopped me from complaining about the game a bit. For example, I’m not a huge fan of all the microtransactions. Personally, I think it would be a lot more fun if every item was obtainable without microtransactions, but I digress.
Oddly enough, I’m not the only person who’s had complaints about the game. Specifically, my friend, Robert, has been frustrated with the in-game color palette, and it’s really no surprise. Rather than being able to select a color using RGB or any number of color systems, we’re stuck visually picking at a color palette. To make matters worse, sometimes the color palette increases complexity by providing a slider (as seen in the example above).
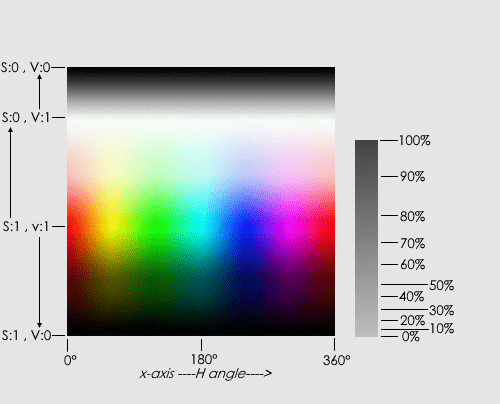
Naturally, Robert took some time to really inspect this color palette to see if there was a way to reason about it. I mean seriously; look at this:

Eventually, he ended up reaching out to me to see if it would be possible to find the location of a color in the in-game color palette. As expected, I took this opportunity to show off the power of Python.
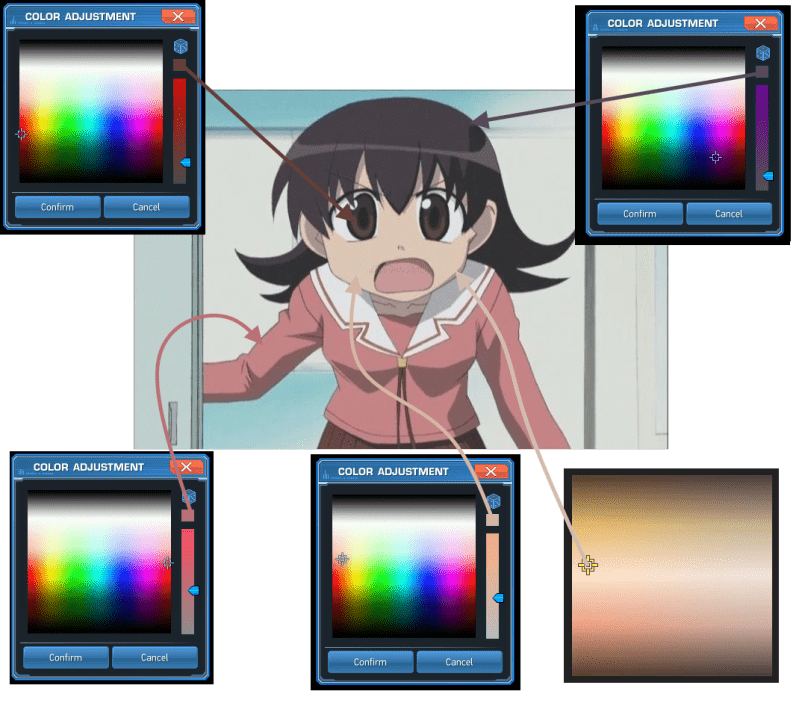
Before long, we had a prototype which could return the location of the closest matching color as well as the proper slider position. From there, it was just a matter of rendering the in-game color palette with the proper selection. If used properly, you can get some pretty close matches to real world examples:

Although, it’s worth mentioning that this image was generated from the in-game palette (with an older version of the software). In other words, these colors were selected by hand. I’d be interested in seeing how close the software generated color palettes match this image of Tomo.
How Does the PSO2 Color Palette Work?
To be quite honest with you, I’m not sure I could do an explanation of the algorithm justice. After all, I didn’t write it; Robert did. However, I did write all the code, so I can give you idea of how the software works from a design perspective.
Overall, the software clocks in at 350 lines of code—most of which is probably comments. That said, the software relies entirely on functions. I didn’t use any classes beyond some of the data structures that I had to import for image generation and data analysis. For example, I largely used two libraries: Numpy and Pillow.
In terms of design, the core of the algorithm can be seen in the following main function:
def main() -> None:
    """
    The drop-in function.

    :return: None
    """
    file_name = input("Please provide file name (include .png): ")
    rgb_input = input("Please enter a color as comma-separated RGB: ")
    color = tuple(int(x.strip()) for x in rgb_input.split(','))
    preview = render_color_palette(color)
    preview.show()
    preview.save(file_name)
Here, we can see that we prompt the user for a file path and an RGB value. Then, we render the color palette and save the result.
Under the hood of the color palette function, we’ll find a much messier algorithm:
def render_color_palette(color: tuple) -> Image.Image:
    """
    Assembles the entire color palette preview from all the render pieces.

    :param color: the color to lookup
    :return: the preview image
    """
    pixel, ratio = get_cast_color_info(color)
    reticle_preview = render_reticle(CAST_COLOR_IMAGE, pixel)
    gradient = generate_gradient(lookup_pixel(CAST_COLOR_IMAGE, pixel), get_average_gray(color), GRADIENT_SIZE)
    gradient_bar = _render_gradient(gradient, GRADIENT_SIZE)
    slider = _render_slider(gradient_bar, ratio)
    color_location = int((1 - ratio) * len(gradient))
    color_preview = _render_color(gradient[color_location], slider, 23)
    preview = _render_preview(reticle_preview, color_preview)
    window_ui = _render_window_ui(preview)
    return window_ui
Basically, this function takes the desired color and computes the location of the pixel and the location of the slider. Then, it takes those values (pixel and ratio) and generates the color palette with them.
One thing that I think is worth pointing out is that the algorithm that actually determines the proper color can be found in the get_cast_color_info() function. This function is driven completely by Robert’s logic. In other words, the remainder of the junk you see here is my best attempt at assembling the color palette image.
All that said, I’m not sure it’s worth digging into all 350 lines of code. If you’re interested in the algorithm that computes the proper color, I’ll probably have to defer to Robert. At the very least, he and I can tag team an article in the future.
Other Changes?
Considering this is the first “release” of the software, I figure it doesn’t make sense to talk about changes. That said, I will say that this software went through a lot of early iterations. For example, it used to only generate the pixel location for all the skin color palettes for Humans, Newmans, and Deumans.
Likewise, the color picker algorithm was a lot more simplistic in the past. Specifically, it assumed that the color palette operated on HSV, so we just searched for colors assuming maximum saturation. Unfortunately, that left a lot to be desired.
Over time, we conquered a lot of undocumented bugs. For instance, here’s one the bugs Robert told me about on Discord:
I found 2 bugs in our program
first one is easy to fix, the slider renders a little to low, so the point doesn’t actually point to the color we want
to fix, we just need to add -9 to the render slider function to account for the 17px hight of the slider sprite
the other one might be tougher
if you pass in a color that gets edge case’d (e.g. a gray, or green (0,255,0)), the program comes to a hard stop, I think it’s having trouble rendering the slider, not sure how to fix that one hahaha
In general, a lot of the design choices were made over Discord. In the future, I’d like to document more of the changes and bugs on GitHub.
Otherwise, that’s it for changes! Let’s talk what’s ahead for the future.
Plans for the Future?
At the moment, I think the biggest future change will be a rebrand. I’m not sure exactly what we want to call the software, but “color picker” is pretty bland.
Also, I’d like to release the software under pip just like with the image-titler. That way, folks could install the software and run it in two commands. Right now, the only way to run this solution is by downloading the source code, and that’s just not ideal.
On top of all that, I think it would be cool to put some text over the color palette with the original RGB color. In general, I think a little text would polish this up nicely—even if it’s not the RGB color.
Beyond that, I have no idea what the future holds. The entire development process has been led by Robert, and I’ve thoroughly enjoyed it. I’m hoping that we can continue working on this project over time.
While you wait, why not read more about my Phantasy Star obsession with these articles:
Otherwise, enjoy the rest of your morning/afternoon/evening. I’ll see you next time!
Recent Meta Posts
With 2023 officially in the books, I figured it was time to do my annual article looking back over the year. Think of it as the Spotify Wrapped for the 3 people who read these articles!
Life has given me a bit of a beating, so I'm taking some time to recover. See y'all again soon.

