Once again, we’re back with yet another update to the image-titler script. This time we incremented the major version with a complete rewrite of the tool. Now, it supports a command line interface and a graphical user interface.
In the remainder of this article, we’ll take a look at what this means, why this change was made, and how it works!
Table of Contents
- What Is a Graphical User Interface?
- Why Add a Graphical User Interface?
- How Does a Graphical User Interface Work?
- Other Changes?
- Plans for the Future?
What Is a Graphical User Interface?
Up until now, the image-titler tool was command line only. In other words, to use it, you had to be comfortable using the text-based interface.
Well, as of 2.0.1, the image-titler now features a complete graphical interface (GUI). Essentially, that means that you can choose to use the application from the command line or opt for an interactive interface.
To launch the gui, you’ll have to use the new image-titler-gui command:
image-titler-gui
At this time, the image-titler-gui entry point does not support command line arguments.
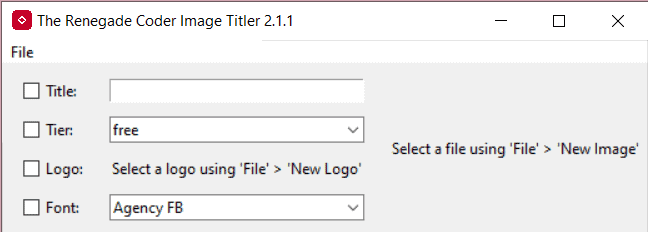
At any rate, once, this command is executed, you’ll be greeted with a few menus:

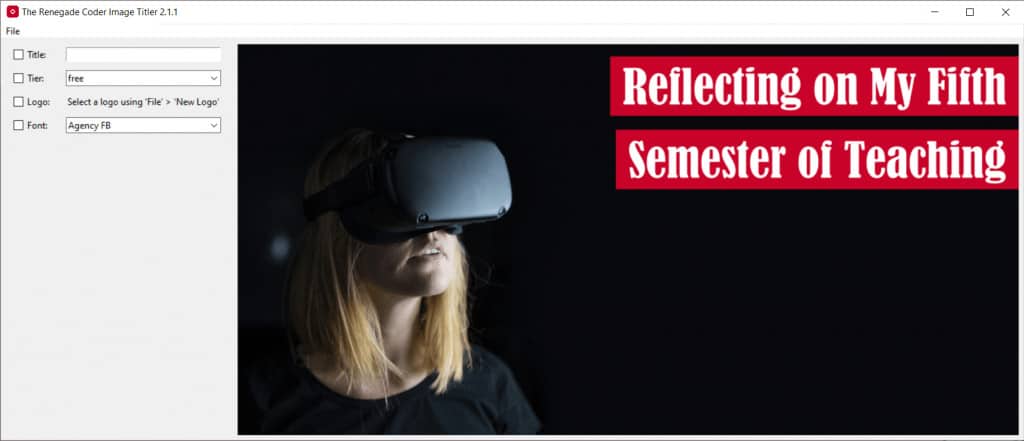
From here, it’s a matter of loading a new image using the File menu:

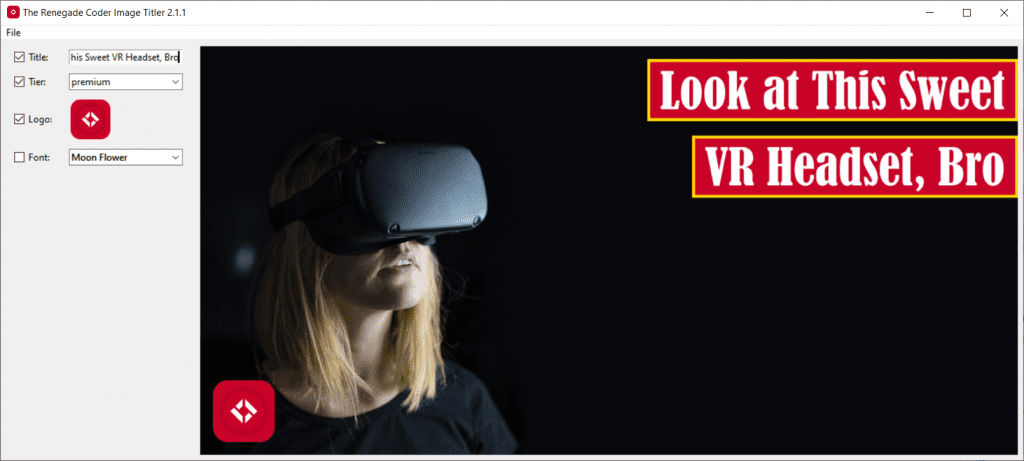
New Image command under File.At this point, the image can be saved using the Save As command under File. Alternatively, we could begin tweaking the settings:

Of course, if you’d rather see the tool in action, here’s a short video:
In the next section, we’ll talk about why I made the decision to build this GUI.
Why Add a Graphical User Interface?
For me, the major rationale was accessibility. While I find the tool useful from the command line, I think most folks would prefer to have some sort of interface to use. Fortunately, my buddy, Robert, was the perfect test subject, so I got to work.
Of course, I couldn’t get total buy-in from Robert, so this was just a first step. In the next update, I’ll be sharing one of his requested features: custom fonts. Likewise, I’ll probably be updating the software to include a Windows installer in the very near future. That way, there is no need to use the command line at all to get up and running.
Another reason I decided to put together the GUI was to challenge myself. After all, I was really curious to see if I could build a live editor from the code I already had written. Turns out, it’s not only possible; it works great! That said, I am a little worried that additional features will slow things down. I guess we’ll just have to wait and see.
Finally, I decided to add a GUI for testing purposes. For me, it’s a lot easier to do systems testing if I have some sort of interface for toggling features. Otherwise, I have to write a bunch of commands by hand. Obviously, it’s a lot easier to tick some boxes and toggle some menus.
How Does a Graphical User Interface Work?
For the sake of time, I won’t go into all the details. That said, for this to work, I decided to break the image-titler script into three files:
- command.py: the command line interface
- gui.py: the graphical user interface
- utilities.py: all the shared code between the two interfaces
The new GUI code is quite extensive—over 300 lines of code—so it doesn’t make sense to share all of it. However, I will give you a peek at the top-level window:
class ImageTitlerMain(tk.Tk):
    """
    The main window. This overrides the root class of tk, so we can make a menu.
    The remainder of the GUI is contained within a frame.
    """

    def __init__(self):
        super().__init__()
        self.menu = ImageTitlerMenuBar(self)
        self.gui = ImageTitlerGUI(self, self.menu)
        self.gui.pack(anchor=tk.W)

    def update_view(self) -> None:
        """
        Updates what's happening visually in the app.
        :return: None
        """
        self.gui.update_view()

    def save_as(self) -> None:
        """
        A save method which saves our preview.
        This has to exist because the menu has no concept of title.
        As a result, this method needed to be pulled up into main window.
        That way, we at least decouple the child to parent relationship
        (i.e. children have to concept of siblings, etc.).
        :return: None
        """
        title = convert_file_name_to_title(
            self.menu.image_path,
            title=self.gui.option_pane.title_value.get()
        )
        save_copy(
            self.menu.image_path,
            self.menu.current_edit,
            output_path=self.menu.output_path,
            title=title
        )
As you can see, there are basically two main elements in the main window: the menu bar and the GUI itself. Inside the GUI element, you’ll find an option menu and a preview pane. Together, the preview pane, option menu, and the menu bar work together to replicate the command line interface (minus the batch processing feature).
Basically, the way everything links together is through a hierarchy of update_view() methods. For example, when the user selects New Image from the File menu, that image path is saved in the menu and the update_view() method is called in the parent. This creates a chain reaction where various elements of the GUI are updated based on the change of state.
Overall, I’m pleased with how this turned out, and I’m excited to begin expanding the tool with new features!
Other Changes?
As with any new feature, there are often a few bug fixes and code changes. For example, when 2.0.0 was released, the code was reorganized into three components (e.g. gui, command line, and utilities) rather than one.
In addition, the process_image() function was massively reworked to separate out the save function. Previously, this was not needed as command line operations are atomic. Now that we can make multiple changes in the GUI before saving, the save functionality had to be decoupled from image processing. Here’s what the function looks like now:
def process_image(
    input_path: str,
    title: str,
    tier: str = "",
    logo_path: Optional[str] = None
) -> Image.Image:
    """
    Processes a single image.
    :param input_path: the path of an image
    :param tier: the image tier (free or premium)
    :param logo_path: the path to a logo
    :param title: the title of the processed image
    :return: the edited image
    """
    img = Image.open(input_path)
    cropped_img: Image = img.crop((0, 0, IMAGE_WIDTH, IMAGE_HEIGHT))
    color = RECTANGLE_FILL
    if logo_path:
        logo: Image.Image = Image.open(logo_path)
        color = get_best_top_color(logo)
        _draw_logo(cropped_img, logo)
    edited_image = _draw_overlay(cropped_img, title, tier, color)
    return edited_image
In addition, I made a slight modification to the command line command. Now, it matches the repo name which matches the pip install image-titler command. For backwards compatibility reasons, I left the original command in: image_titler.
Finally, in 2.0.1, I fixed a bug that caused titles to not be reflected in the image file name.
Plans for the Future?
At the time of publishing, there’s already a new version of the image-titler out now: 2.1.1. By popular demand, I’ve included custom fonts which work in both the command line and GUI version of the software.
In the future, there’s a ton I’d like to to do. For example, I think the next biggest change will be to apply the command line options to the GUI entry point. This will likely result in a bit of interface rework.
After that, I’d like to work on custom image sizing. For that, I’m planning to use image classes like YouTube and Twitter rather than letting a user specify dimensions.
As always, if there’s any feature you’d like to see, go ahead and add it to the list of issues . While you’re over there, help the repo grow by giving it a star.
If you’d like to support the site, I have a list of ways you can do that. In it, you’ll learn about different ways you can help grow the site like joining me on Patreon or hopping on my newsletter.
In addition, here are a few related articles:
- Image Titler 1.8.4 Features Logo Primary Color Detection
- Image Titler 1.7.2 Features Batch Processing
Once again, thanks for hanging out! See you next time.
Recent Meta Posts
With 2023 officially in the books, I figured it was time to do my annual article looking back over the year. Think of it as the Spotify Wrapped for the 3 people who read these articles!
Life has given me a bit of a beating, so I'm taking some time to recover. See y'all again soon.

