Looks like I’m finally caught up on updates! This time around I’m sharing the latest feature of the image-titler: custom fonts. In the remainder of this article, we’ll talk about what that is, why the feature was added, and how it works.
Table of Contents
- What Are Custom Fonts?
- Why Add Custom Fonts?
- How Do Custom Fonts Work?
- Other Changes?
- Plans for the Future?
What Are Custom Fonts?
Previously, the image-titler only had a handful of features that suited my needs. For example, I was able to customize the title if the file name couldn’t support my title name. Likewise, I could choose to add a color border to the title bars.
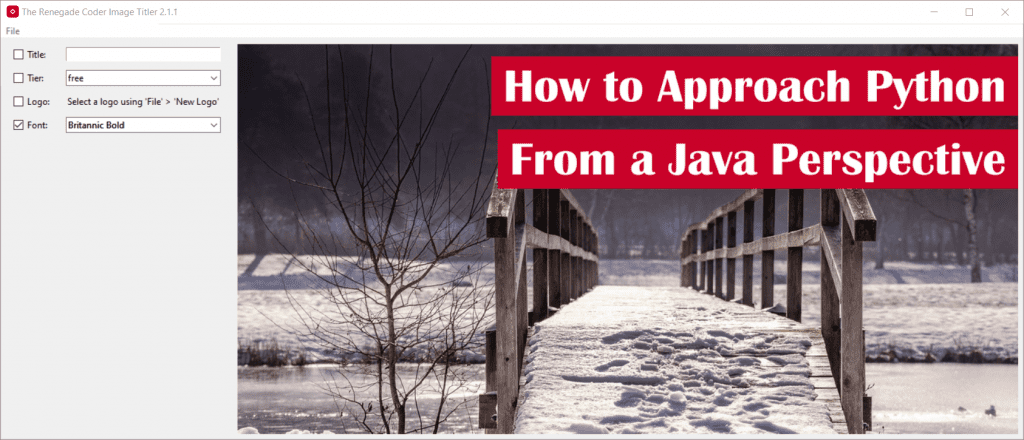
Of course, one feature that was missing was the ability to change the title font (i.e. custom fonts). Now, a user can select a font file using the -f option in the command line interface (CLI). As long as supplied font exists, the user will the see something like the following (note the difference between this image and this article’s featured image):

Alternatively, the user can launch the GUI and select a new font using the font option:

The list of fonts you see are generated from the fonts that can be found in the usual places on your system. As a result, if you want to use a font in the GUI, you’ll have to install it on your system. Otherwise, use the CLI.
Now, you can experiment with different title fonts. Enjoy!
Why Add Custom Fonts?
When it came to deciding on different features, custom fonts was actually a request from my friend, Robert, who was interested in using the tool for YouTube thumbnails. By offering this feature, he would be able to personalize his thumbnails a bit more.
Of course, adding custom fonts is sort of an obvious choice. After all, this feature is really straightforward and opens the door to a lot of creative possibilities. Hell, I found a source that claims there are at least half a million fonts in existence , so this seemed like the right move.
Finally, I just wanted to see if I could do it. Having almost no experience with fonts, I felt like this would be a fun challenge. Also, the code was already setup in a way that would allow me to support different fonts—at least on the CLI side. Of course, the GUI side was a different story.
As it turns out, adding custom fonts was actually a pretty painful challenge, but I made it work. In the next section, we’ll talk about how.
How Do Custom Fonts Work?
The first step to supporting custom fonts was to adjust the section of the code that actually uses fonts. That would be the draw_text() function:
def _draw_text(draw: ImageDraw, position: int, width: int, text: str, font: ImageFont):
    """
    Draws text on the image.
    :param draw: the picture to edit
    :param position: the position of the text
    :param width: the width of the text
    :param text: the text
    :param font: the font of the text
    :return: nothing
    """
    draw.text(
        (IMAGE_WIDTH - width - X_OFFSET, position),
        text,
        fill=TEXT_FILL,
        font=font
    )
def _draw_text(draw: ImageDraw, position: tuple, text: str, font: ImageFont):
    """
    Draws text on the image.
    :param draw: the picture to edit
    :param position: the position of the text as an (x, y) tuple
    :param text: the text
    :param font: the font of the text
    :return: nothing
    """
    draw.text(
        position,
        text,
        fill=TEXT_FILL,
        font=font
    )
As it turns out, this method was already setup for custom fonts. However, what it wasn’t setup to handle was the reality that fonts have different shapes and sizes. As a result, it didn’t make sense to calculate the same position for every font. We needed to do that algorithmically. Thus, the _get_text_position() function was born:
def _get_text_position(text_width, text_height, text_ascent, y_offset) -> tuple:
    """
    A helper function which places the text safely within the title block.
    A lot of work went into making sure this function behaved properly.
    :param text_width: the width of the text bounding box
    :param text_height: the height of the text without the ascent
    :param text_ascent: the height of the ascent
    :param y_offset: the y location of the title block
    :return: a tuple containing the x, y pixel coordinates of the text
    """
    return (
        IMAGE_WIDTH - text_width - X_OFFSET,
        y_offset - text_ascent + (RECTANGLE_HEIGHT - text_height) / 2
    )
Essentially, this function ensures text is centered in the title block regardless of which font is chosen. Bet you didn’t imagine a bunch of math went into that?
At any rate, the code still needed to be modified to support custom fonts, so I made that change in our favorite process_image() function:
def process_image(
        input_path: str,
        title: str,
        tier: str = "",
        logo_path: Optional[str] = None
) -> Image.Image:
    """
    Processes a single image.
    :param input_path: the path of an image
    :param tier: the image tier (free or premium)
    :param logo_path: the path to a logo
    :param title: the title of the processed image
    :return: the edited image
    """
    img = Image.open(input_path)
    cropped_img: Image = img.crop((0, 0, IMAGE_WIDTH, IMAGE_HEIGHT))
    color = RECTANGLE_FILL
    if logo_path:
        logo: Image.Image = Image.open(logo_path)
        color = get_best_top_color(logo)
        _draw_logo(cropped_img, logo)
    edited_image = _draw_overlay(cropped_img, title, tier, color)
    return edited_image
def process_image(
        input_path: str,
        title: str,
        tier: str = "",
        logo_path: Optional[str] = None,
        font: Optional[str] = FONT
) -> Image.Image:
    """
    Processes a single image.
    :param font: the font of the text for the image
    :param input_path: the path of an image
    :param tier: the image tier (free or premium)
    :param logo_path: the path to a logo
    :param title: the title of the processed image
    :return: the edited image
    """
    img = Image.open(input_path)
    cropped_img: Image = img.crop((0, 0, IMAGE_WIDTH, IMAGE_HEIGHT))
    color = RECTANGLE_FILL
    if logo_path:
        logo: Image.Image = Image.open(logo_path)
        color = get_best_top_color(logo)
        _draw_logo(cropped_img, logo)
    edited_image = _draw_overlay(
        cropped_img,
        title=title,
        tier=tier,
        color=color,
        font=font
    )
    return edited_image
Clearly, things are getting a bit out of hand, but this was how the new font information was applied.
At this point, it was just a matter of adding a new option to both the CLI and GUI, and we were all set! Here’s what that looks like for both tools:
def parse_input() -> argparse.Namespace:
    """
    Creates and executes a parser on the command line inputs.
    :return: the processed command line arguments
    """
    parser = argparse.ArgumentParser()
    parser.add_argument('-t', '--title', help="add a custom title to the image (no effect when batch processing)")
    parser.add_argument('-p', '--path', help="select an image file")
    parser.add_argument('-o', '--output_path', help="select an output path for the processed image")
    parser.add_argument('-r', '--tier', default="", choices=TIER_MAP.keys(),
                        help="select an image tier")
    parser.add_argument('-l', '--logo_path', help="select a logo file for addition to the processed image")
    parser.add_argument('-b', '--batch', default=False, action='store_true', help="turn on batch processing")
    parser.add_argument('-f', "--font", default=FONT, help="change the default font by path (e.g. 'arial.ttf')")
    args = parser.parse_args()
    return args
def _render_preview(self, title, tier="", logo_path=None, text_font=FONT) -> None:
    """
    Renders a preview of the edited image in the child preview pane.
    :param title: the title of the image
    :param tier: the tier of the image
    :param logo_path: the path to the logo for the image
    :return: None
    """
    title = convert_file_name_to_title(self.menu.image_path, title=title)
    self.menu.current_edit = process_image(
        self.menu.image_path,
        title,
        tier=tier,
        logo_path=logo_path,
        font=text_font
    )
    maxsize = (1028, 1028)
    small_image = self.menu.current_edit.copy()
    small_image.thumbnail(maxsize, Image.ANTIALIAS)
    image = ImageTk.PhotoImage(small_image)
    self.preview.config(image=image)
    self.preview.image = image
Also, I think it’s worth noting that the GUI end was a bit more painful to put together. After all, it required retrieving all of the fonts on the user’s system which didn’t seem to be a feature available in Python or any of the 3rd party libraries we were already using.
At any rate, it’s clear that more went into adding custom fonts, but this was a nice overview. If you’re interested in digging into these changes a bit more, here’s a link to the repo at v2.1.1.
Other Changes?
Typically, I would take some time to talk all about the additional changes I made, but this feature was so challenging I didn’t make any. Well, at least, I didn’t make any obvious changes.
That said, when I first released v2.1.0, I managed to break the gui. While it was working fine on my machine (famous last words—I know), it somehow crashed when I deployed it. As it turns out, I reluctantly added a new dependency and forgot to include it in the setup.py file:
install_requires=[
    'titlecase',
    'pillow>=6.0.0',
    'pathvalidate',
    'piexif',
    'matplotlib'
 ]
As a result, v2.1.1 was a quick fix for that issue.
Also, I made some minor modifications the the GUI components. Instead of using tk components, I opted for ttk components. This allowed me to use a ComboBox for the font menu which turned out to be a lot cleaner than the built-in OptionMenu.
If you’re interested in the full list of changes, I recommend checking out the following pull request . Otherwise, we’ll dive into what’s next!
Plans for the Future?
Currently, I’m working on redesigning the library to support a set of generic keyword arguments. That way, all I have to do is maintain a dictionary of arguments throughout the application. Then, if we decide to add new features, it’s a matter of adding support within functions without breaking interfaces. It was getting a bit cumbersome to add new default arguments.
Meanwhile, I’m also planning to add the CLI to the GUI, so users can populate the application before loading up. To me, this seems like a great way to get started with image templates.
Also, while this refactoring is happening, I’ll need to go through a process of cleaning up documentation. At that point, I will probably publish my documentation to a subdomain of this website.
In the meantime, why not check out some of these related articles:
- Image Titler 1.4.1 Features Borders
- Image Titler 1.6.0 Features Version Tagging on Output File Names
If you want to go the extra mile, consider checking out my list of ways to grow the site. There, you’ll find links to my newsletter as well as my YouTube channel.
Otherwise, thanks for hanging out! See ya next time.
Recent Meta Posts
With 2023 officially in the books, I figured it was time to do my annual article looking back over the year. Think of it as the Spotify Wrapped for the 3 people who read these articles!
Life has given me a bit of a beating, so I'm taking some time to recover. See y'all again soon.

