In the latest version of the Image Titler, I’ve gone bonkers and completely rewritten majors sections of the code. Oh wait, I meant: I added a featured that lets you preload the GUI with settings from the command line. Let’s dive in!
Table of Contents
- What Are Preloaded GUI Settings?
- Why Add Preloaded GUI Settings?
- How Do Preloaded GUI Settings Work?
- Other Changes?
- Plans for the Future?
What Are Preloaded GUI Settings?
When the graphical user interface (GUI) came around in 2.0.0, I hadn’t actually included a command line interface (CLI) interface for it. Basically, the idea was going to be to package the GUI as a standalone executable, so that wouldn’t have mattered anyway. Of course, I still haven’t found a way to package the tool just yet.
At any rate, that got me thinking, why doesn’t the GUI have a CLI? After all, it would be nice to be able to setup some settings before the application ever opens. That’s when the idea of preloaded GUI settings was born.
Now, folks who are used to the CLI can easily jump to the GUI interface without skipping a beat. For example, the following command will generate an image with a logo in the CLI:
image-titler -p "path/to/image" -l "path/to/logo"
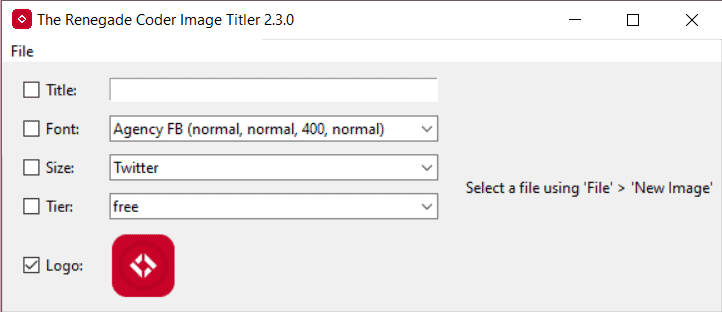
Now, if a user were to load the GUI with the same settings, they’d see a window preloaded with an image and a logo:
image-titler-gui -p "path/to/image" -l "path/to/logo"
To see this live, check out the command I run to preload the GUI with my logo:
image-titler-gui -o "E:\Documents\Work\Employers\ME\The Renegade Coder\Assets\Featured Images\Edits" -l "E:\Documents\Work\Employers\ME\The Renegade Coder\Assets\Logos\Icon\the-renegade-coder-sample-icon.png"
Currently, the output path has no effect. That said, in the future, I hope to preload the “Save As” menu.
At any rate, when I pop this command into the terminal, I get the following window:

Now, I don’t have to bother looking up this logo every time I need to generate an image; it’s always preloaded.
In the next section, we’ll look at why I added this feature.
Why Add Preloaded GUI Settings?
As someone who built this tool from the ground up, I honestly didn’t plan to use the GUI at all. After all, I had pretty simple requirements: I just wanted some way to repeatedly generate images with titles and logos.
Well, as the image-titler grew, I realized that it’s often a huge pain to change the command by hand. For example, if I had a title that couldn’t be written as a file name (e.g. example-title:-this-is-illegal?.jpg), I’d have to write the title out by hand using the -t option. Then, of course, I’d have to run the program to make sure it rendered properly.
Now, I can preload the GUI with all my usual settings. For example, I have a logo that I don’t feel like navigating to every execution. In addition, I can navigate to the file I want to edit just like I normally would. Of course, now I get a live preview. If I don’t like how it looks, I can quickly change the title in the interface without having to save a bad image first.
All that said, to be honest, this change was just a huge excuse to make some much needed changes that we’ll cover later.
How Do Preloaded GUI Settings Work?
As you can probably imagine, the settings that go into the regular CLI interfaces have to be parsed somehow. To do that, I use the built-in argparse functionality. Here’s what the bulk of that looks like in 2.2.0:
def parse_input() -> argparse.Namespace:
    """
    Parses the command line input.
    :return: the processed command line arguments
    """
    parser = argparse.ArgumentParser()
    _add_title_option(parser)
    _add_path_option(parser)
    _add_output_path_option(parser)
    _add_tier_option(parser)
    _add_logo_path_option(parser)
    _add_batch_option(parser)
    _add_font_option(parser)
    args = parser.parse_args()
    return args
Now, it’s one thing to just pass the command line input to the GUI. It’s another thing entirely to make use of that information. As a result, a new function was born:
def _init_vars(self) -> None:
    """
    Initializes the options pane based on any initial options.
    :return: None
    """
    # TODO: remove this method and add each section to each initialization method
    title = self.options.get(KEY_TITLE)
    ImageTitlerOptionPane._populate_option(title, self.title_value, self.title_state, "")
    tier = self.options.get(KEY_TIER)
    ImageTitlerOptionPane._populate_option(tier, self.tier_value, self.tier_state, list(TIER_MAP.keys())[0])
    font = self.options.get(KEY_FONT)
    self.font_value.set(sorted(list(FONTS.keys()))[0])
    if font != DEFAULT_FONT:
        font = next(k for k, v in FONTS.items() if Path(v).name == font)
        ImageTitlerOptionPane._populate_option(font, self.font_value, self.font_state)
    logo = self.options.get(KEY_LOGO_PATH)
    self.logo_state.set(1 if logo else 0)
Basically, this function takes everything that is loaded on the command line and preloads the option menu with that data. That way, when the user opens the application, the option menu already has their default settings selected.
In case your curious, here’s what happens when we populate each option:
@staticmethod
 def _populate_option(option: str, value: tk.StringVar, state: tk.IntVar, default_option: str = None):
    if option:
        value.set(option)
        state.set(1)
    else:
        value.set(default_option)
        state.set(0)
Basically, if the option is present, we set the associate value and turn on the checkbox. If it’s not, we disable the checkbox and set some default value.
All of this comes together when the application launches. At that point, the user should see all of their settings preloaded.
In the next section, we’ll take a look at some other changes that were made.
Other Changes?
If you pull open the pull request for this change, you’ll find a pretty scary place. First, just from a metrics perspective, you’ll find 76 commits and 62 files changed. But, what all happened?
To put it plainly, I completed reworked all the code. For example, the main script went from three files (e.g. utilities, command, and gui) to six files (e.g. cli, gui, draw, parse, store, and constants).
This change allowed me to decouple a ton of functionality and rework the primary interfaces. For example, all of the utilities have been reduced to three commands: parse_input(), process_images(), and save_copies().
Due to all these changes, I had to completely rework the test plan as well. Luckily, the three interfaces are pretty easy to test (at least on the input end). Of course, I mainly do integration testing which lets me generate a set of test images that I can inspect for quality.
Besides the main rework, I made the following updates:
- All system fonts now display in the fonts list (this was a bug)
- The title command now works in batches
- Batch setting now has a default functionality
Overall, I’m quite pleased with this update, and I think it will make changes much easier in the future.
Plans for the Future?
At the time of writing, I’ve already pushed out 2.3.0 which includes the custom size filter . As for the future, I have a ton of great ideas. For instance, I’m thinking about adding an image search feature, so I don’t have to go to Pixabay myself. In other words, I can just search up images directly in the tool.
Of course, I’d be happy to list off all my current plans, but that’s why I have a list of issues. If you have your own ideas and don’t see them listed, feel free to share!
While you’re here, I figured it might be nice to see some of the progress we’ve made along the way with the following articles:
In the meantime, I’ll continue grinding. I’m really, really enjoying this project, so I hope you do too.
Recent Meta Posts
With 2023 officially in the books, I figured it was time to do my annual article looking back over the year. Think of it as the Spotify Wrapped for the 3 people who read these articles!
Life has given me a bit of a beating, so I'm taking some time to recover. See y'all again soon.

